Навчальний посібник із 3D-контролера Worm для Unity
У цьому підручнику я покажу, як створити простий контролер хробака в Unity, натхненний серією посібників з розробки ігор для початківців TornadoTwins.
Контролер хробака буде ковзати з ефектом плавного слідування за хвостом і матиме здатність стрибати.
Сценарії в цьому посібнику спочатку були написані на JavaScript (він же UnityScript), який більше не підтримується, тому я запропоную C# альтернативу.
Щоб створити контролер хробака в Unity нам знадобиться:
- Створіть необхідні сценарії
- Створіть персонажа-хробака
- Призначте скрипти персонажу
Крок 1. Створіть усі необхідні сценарії
Почнемо зі створення всіх скриптів, які знадобляться для налаштування контролера хробака:
- Створіть новий сценарій, назвіть його "SC_WormController" і вставте в нього наведений нижче код:
SC_WormController.cs
using System.Collections;
using System.Collections.Generic;
using UnityEngine;

[RequireComponent(typeof(CharacterController))]
public class SC_WormController : MonoBehaviour
{
    public float speed = 3.0f;
    public float rotateSpeed = 1.0f;
    public float jumpSpeed = 5.0f;
    public float gravity = 9.8f;

    CharacterController controller;
    Vector3 moveDirection;

    // Start is called before the first frame update
    void Start()
    {
        controller = GetComponent<CharacterController>();
    }

    // Update is called once per frame
    void Update()
    {
        // Rotate around y - axis
        transform.Rotate(0, Input.GetAxis("Horizontal") * rotateSpeed, 0);

        // Move forward / backward
        Vector3 forward = transform.TransformDirection(Vector3.forward);
        float curSpeed = speed * Input.GetAxis("Vertical");
        float movementDirectionY = moveDirection.y;
        moveDirection = forward * curSpeed;

        // Jumping
        if (Input.GetButtonDown("Jump") && controller.isGrounded)
        {
            moveDirection.y = jumpSpeed;
        }
        else
        {
            moveDirection.y = movementDirectionY;
        }

        // Apply gravity. Gravity is multiplied by deltaTime twice (once here, and once below
        // when the moveDirection is multiplied by deltaTime). This is because gravity should be applied
        // as an acceleration (ms^-2)
        if (!controller.isGrounded)
        {
            moveDirection.y -= gravity * Time.deltaTime;
        }

        // Move the controller
        controller.Move(moveDirection * Time.deltaTime);
    }
}- Створіть новий скрипт, назвіть його "SC_CameraFollow" і вставте в нього наведений нижче код:
SC_CameraFollow.cs
using System.Collections;
using System.Collections.Generic;
using UnityEngine;

public class SC_CameraFollow : MonoBehaviour
{
    /*
    This camera smoothers out rotation around the y-axis and height.
    Horizontal Distance to the target is always fixed.

    There are many different ways to smooth the rotation but doing it this way gives you a lot of control over how the camera behaves.

    For every of those smoothed values we calculate the wanted value and the current value.
    Then we smooth it using the Lerp function.
    Then we apply the smoothed values to the transform's position.
    */

    // The target we are following
    public Transform target;
    // The distance in the x-z plane to the target
    public float distance = 10.0f;
    // the height we want the camera to be above the target
    public float height = 5.0f;
    // How much we
    public float heightDamping = 2.0f;
    public float rotationDamping = 3.0f;

    void LateUpdate()
    {
        // Early out if we don't have a target
        if (!target)
            return;

        // Calculate the current rotation angles
        float wantedRotationAngle = target.eulerAngles.y;
        float wantedHeight = target.position.y + height;
        float currentRotationAngle = transform.eulerAngles.y;
        float currentHeight = transform.position.y;

        // Damp the rotation around the y-axis
        currentRotationAngle = Mathf.LerpAngle(currentRotationAngle, wantedRotationAngle, rotationDamping * Time.deltaTime);

        // Damp the height
        currentHeight = Mathf.Lerp(currentHeight, wantedHeight, heightDamping * Time.deltaTime);

        // Convert the angle into a rotation
        Quaternion currentRotation = Quaternion.Euler(0, currentRotationAngle, 0);

        // Set the position of the camera on the x-z plane to:
        // distance meters behind the target
        transform.position = target.position;
        transform.position -= currentRotation * Vector3.forward * distance;

        // Set the height of the camera
        transform.position = new Vector3(transform.position.x, currentHeight, transform.position.z);

        // Always look at the target
        transform.LookAt(target);
    }
}- Створіть новий сценарій, назвіть його "SC_SmoothFollow" і вставте в нього наведений нижче код:
SC_SmoothFollow.cs
using System.Collections;
using System.Collections.Generic;
using UnityEngine;

public class SC_SmoothFollow : MonoBehaviour
{
    // The target we are following
    public Transform target;
    // The distance in the x-z plane to the target
    public float distance = 10.0f;
    // the height we want the camera to be above the target
    public float height = 5.0f;
    // How much we
    public float heightDamping = 2.0f;
    public float rotationDamping = 3.0f;

    // Start is called before the first frame update
    void Start()
    {
        if (!target) return;

        transform.LookAt(target);
    }

    void LateUpdate()
    {
        // Early out if we don't have a target
        if (!target) return;

        // Calculate the current rotation angles
        float wantedRotationAngle = target.eulerAngles.y;
        float wantedHeight = target.position.y + height;

        float currentRotationAngle = transform.eulerAngles.y;
        float currentHeight = transform.position.y;

        // Damp the rotation around the y-axis
        currentRotationAngle = Mathf.LerpAngle(currentRotationAngle, wantedRotationAngle, rotationDamping * Time.deltaTime);

        // Damp the height
        currentHeight = Mathf.Lerp(currentHeight, wantedHeight, heightDamping * Time.deltaTime);

        // Convert the angle into a rotation
        var currentRotation = Quaternion.Euler(0, currentRotationAngle, 0);

        // Set the position of the camera on the x-z plane to:
        // distance meters behind the target
        transform.position = target.position;
        transform.position -= currentRotation * Vector3.forward * distance;

        // Set the height of the camera
        transform.position = new Vector3(transform.position.x, currentHeight, transform.position.z);

        // Always look at the target
        transform.LookAt(target);
    }
}
Крок 2: Створіть персонажа-черв'яка
Наступним кроком буде створення персонажа-хробака:
- Створіть нову сферу (GameObject -> 3D Object -> Sphere), змініть її позицію на (0, 0, 0), видаліть її компонент SphereCollider і перейменуйте її на "Worm"

- Скопіюйте сферу "Worm", перейменуйте її на "BodyPart1", змініть її положення на (0, -0.1, -0.9) і змініть її масштаб на (0.8, 0.8, 0.8)
- Знову продублюйте сферу "Worm", перейменуйте її на "BodyPart2", змініть її положення на (0, -0,2, -1,6) і змініть її масштаб на (0,6, 0,6, 0,6)

- Клацніть правою кнопкою миші на об’єкті "Worm" -> Create Empty та перейменуйте щойно створений об’єкт на "Eyes"
- Скопіюйте сферу "BodyPart2", перейменуйте її на "Eye" і перемістіть всередину об’єкта "Eyes", змініть її положення на (-0,24, 0,353, 0,324) і змініть її масштаб на (0,4, 0,4, 0,4)
- Скопіюйте сферу "Eye" і змініть її позицію X на 0,24

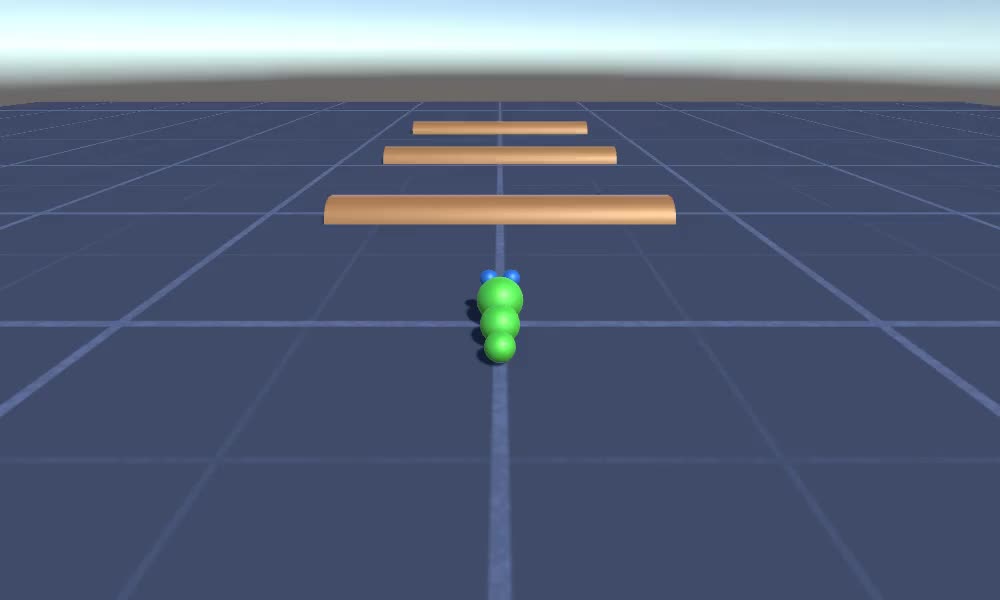
- Для візуалізації можна створити кілька матеріалів, наприклад, зелений для тіла і блакитний для очей.

Персонаж Черв'як готовий.
Крок 3: Налаштуйте Worm Controller
Останнім кроком є призначення сценаріїв:
- Приєднайте сценарій SC_CameraFollow до об’єкта «Головна камера» та призначте "Worm" Sphere цільовій змінній:

- Прикріпіть сценарій SC_WormController до сфери "Worm" (він автоматично додасть інший компонент під назвою CharacterController):

- Приєднайте сценарій SC_SmoothFollow до сфери "BodyPart1" і встановіть його значення, як на скріншоті нижче:

- Прикріпіть сценарій SC_SmoothFollow до сфери "BodyPart2" і встановіть його значення, як на скріншоті нижче:

Тепер контролер готовий, використовуйте W, A, S і D для переміщення та пробіл для стрибка.
Вихідний пакет Unity доступний нижче.